Cathedral Windows

April 29th, 2012

We had a great class last week at Hoppin’ Bobbin in Aberdeen! Cathedral Windows by Machine! The entire quilt comes together so much more quickly when constructing it with a sewing machine. Hand-sewn cathedral windows, while absolutely beautiful, take a long, long time. The students in this class picked such a variety of fabrics for their quilt too! Wow! I was quite impressed!

And by the way, did you know that a Cathedral Window quilt is not really a quilt at all? It traditionally does not have the three layers; top, batting and backing – so it can not be called a quilt.  Most quilt shows put it in the “other” category – just so you know.


And Finally, I Have Arrived!

April 24th, 2012

I am officially listed in the Checkers Catalog! All my patterns and my 15-Degree Triangle Ruler. Click on the link and it takes you straight to the listing that is all me! On the side of the page are pictures of all the companion quilt projects that the ruler can make.  If you see something you like, just ask your local quilt shop to order it. Its been an amazing roller-coaster ride. Lots of Hurry-ups and Waits! But the waiting it over! Twelve months of quilt making, pattern writing and ruler tweaking…

Hmmm, now what will I do….

New York Beauty Simplified

April 18th, 2012

I had the good fortune to be able to take Linda Hahn’s New York Beauty Simplified class yesterday with the Flying Geese Quilt Guild. With Linda’s informative yet relaxed teaching style, it was so SIMPLE! It is truly what it says it is – Simplified.

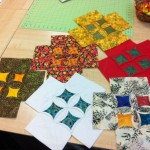
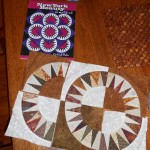
Here’s the blocks I finished and have even started 6 more – I suspect that if I didn’t get chatty in classes I would get a lot more completed!

Linda’s  technique is so amazing and liberating. I’ve done a New York Beauty before and it just took FOREVER! One of the things that makes it  so appealing is the foundation paper she uses.  EQ Printable Foundation Paper It does not have to be ripped out! When you wash it, it turns to a thin layer of polyester in your quilt but truthfully, it is such a supple product that you really can’t tell if its in there or not – so no need to wash your quilt (until it gets dirty!)

So, if you have always been intrigued by this block but thought it was just way too complicated – not so  any more. And if you get the chance, take a class with Linda or do the next best thing and get the book – or both! I am looking forward to New York Beauty Diversified coming out next year.

Its Here!

April 10th, 2012

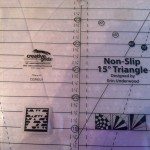
My ruler has finally arrived! It is in production as we speak/type! Creative Grids 15-Degree Triangle designed by Erin Underwood! So cool to see my name in print on it!

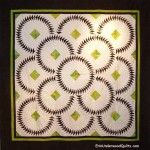
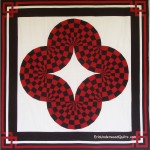
And I’ve got 12 patterns in my Fantastic Fan series ready to go! They all use the ruler, of course, but offer a wide variety of expected and unexpected ways to use a fan block. Slowly but surely, I will be getting them loaded in my gallery but here’s a sneak peak at just a few!


Come to Hoppin’ Bobbin in Aberdeen Maryland for an Free Trunk Show/Open House featuring all my new quilts on Tuesday evening, June 5th.

Making Tracks!

April 1st, 2012

Goose Tracks that is! Another Goose Block of the Month installment ready to go – hope you are keeping up!

I love this block but it can be a bit tricky. “Y” seams and bias edges! But really  – can it be any harder that measuring in 16th inch increments as with the Goose in the Pond?


So cut some diamonds, insert those Y seams and let those geese leave tracks all over your quilt!

Goose Tracks

Only one more block to go for the Goose Block of the Month Series. After the last block, I will post how to put it all together with a great Goose border!


Another Awwww.. Moment

March 23rd, 2012

This little fellow, we call him Jack, is demanding a lot of attention this afternoon. Here he sits (or should I say lays) on my files blocking my view of the computer screen! Now I am furiously trying to finish writing patterns for the last few quilts that will debut at the May Market with my new Creative Grids ruler and the pressure is on! So I debate about pushing him out of my way of the computer screen and off my file full of notes on the pattern  that I am so diligently writing. But there’s a back-story to his attention seeking so I hesitate.

As it turns out, Jack has just returned from the vet after having gotten his furry little balls snipped in just the right places to give me peace of mind and  hopefully keep him home at night.  So yes, Jack is a little doped up as would any male need to be after such an intrusion into his person.

Jack has been so happy to see me this afternoon that he has followed me everywhere until everywhere landed him on top of my work! I’ve decided to let Jack sit where he is, write from memory and tilt my head awkwardly around him to see the screen because as it turns out, I am still the good guy. Luckily for me, Jack doesn’t seem to hold grudges despite the fact that I put him in the cat carrier, drove him in the car for miles and abandoned him to a bunch of strangers who did unspeakable things to his private parts.  All that seems to be important to him is that I came to rescue him and brought him home. I will take what ever adoration I can get…

Awww….

March 16th, 2012

Its nice to know somebody likes my quilts!


Great Quilting Retreats going “Live” Today

March 8th, 2012

Hi all, I received emails today from both of the retreats I will be teaching at this year and both have their websites up and running!

The Mid-Appalachian Quilters  (MAQ) meets in July of every year at Mount St. Mary’s College in Emmittsburg, Maryland. The location is spectacular. The views are impressive and the history around the college is fascinating too! And that’s not even the best part – there’s the CLASSES! Take some time to check out all that they have to offer.  There’s quite a smattering of teachers and techniques there. Even Long-arm classes! Registration for this 3-day weekend event starts Saturday, April 7th!

Also going live today is Quilt Camp 2012 aka Ripley – named so because it is located in picturesque Ripley, West Virginia! Check out the great job Peg Bingham has done with this website. I feel just like a movie star! This retreat is a week long event with 1-day and 2-day classes.  Lots of interesting offerings here too! Ironically, registration for this one starts just 2 days after MAQ on Monday, April 9th.

If either of these interests you and your friends, hurry with your registration! I’m told both of these great retreats fill up fast!

Basting Spray, Yes or No?

March 2nd, 2012

Finally, I have proven to myself why I don’t want to use basting spray in my quilts.  I have a can of basting spray, June Tailor’s Quilt Basting Spray, that I bought at JoAnn’s a year ago for a class. So we used it in class – or I should say, out in the back yard. We took our fabric and batting outside where there was a table covered with newspaper, laid everything out on that and sprayed away (following the manufacturer’s instructions, of course). Then we trekked back in to finish the project, which was a sweat shirt jacket, by the way.

So when I’m teaching Machine Quilting 101 this is the only experience I can truly talk about although I do state that I am not confident about using it in my quilts. Another tidbit I pass on to everyone is that I have heard that Sulky’s basting spray with the green cap will not gum up your needle – overheard that in a class somewhere, I think.

But the other day, my husband and I were trying to fix a most unusual problem with his over-driven, over-aged truck. The fabric on the ceiling was drooping in the center of his truck ceiling. In addition, it was coming unattached at the windshield, falling down and blocking his view. The particularly odd thing about it all was as he drove along and the cab of the truck warmed up, the fabric would retract, lifting back into place on the ceiling.

I had the great idea of taking this basting spray and spraying it up between the layer of fabric and the formed fiberboard that provided insulation between the cab and the metal top of the truck.  I know, I know, its basting spray, right, so it probably won’t be permanent but I wasn’t telling him that. I was just hopeful that it would stick!

We peeled back the fabric a bit and attempted to spray between the layers. When that was not too successful, I actually held the fabric away from the ceiling and my husband sprayed. This technique enabled him to get a good coating on the fabric as well as my hands!! We stuck the fabric to the ceiling – it felt rather damp but it stayed well enough to see where we were going for the day.

But here’s what convinced me that basting spray is not for me. I went inside to wash my hands since they were covered just about as well as the ceiling of the truck. I rinsed with warm water. I used dish soap. I used the scrubby thing for pans. Nothing worked! In order to get this stuff off my hands I had to resort to Goo Gone which was probably just one step up from the fingernail polish remover I was contemplating using next.

If you go to the June Tailor site for this stuff, it specifically states that you can wash this glue out of your quilt in the washing machine with detergent or you may have to dry clean your quilt if it isn’t all cotton. There were no instructions on how to remove it from skin but hey, if laundry detergent works,  shouldn’t  Dawn Dish Soap?

They have not been completely honest with me about this so I’m not ever using it on one of my quilts! That sweatshirt jacket is finished but its too ugly to wear so I don’t have to worry about the glue in that thing! My husband’s truck – well, it didn’t last. It is basting spray after all. I think it couldn’t handle the temperature changes so we just stapled the fabric up – worked like a charm!
Goose in the Pond!

February 29th, 2012

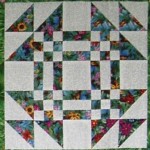
As much as it is raining outside today, I could have geese in my front yard! But it will have to suffice for now to have them in my quilting room. This is one of my favorite blocks. It can be done with one fabric and a background or very scrappy.


This block is a little tricky because you will be measuring with 1/16ths. 1/16ths, you say!! Where is that? Ok – on your ruler, every inch is divided into 8 sections or 1/8th inch marks. I think you should go get your ruler right now – go on, I’ll wait…

Now, where were we…. So if you were to imagine another hash-mark right between each 1/8th mark, that would be a 16th measurement. However, there just isn’t enough room to print all those lines on there so we have to improvise.

Another way to look at it is 1/8th equals 2/16ths. 2/8ths equals 1/4 inch but it also equals 4/16ths. Any of this sounding familiar yet – fractions in 4th or 5th grade, I’m thinking…

This pattern uses 5/16ths and 15/16ths.  Lets start with 5/16th. Remember that 4/16ths = 2/8ths =  1/4 inch – all the same line on the ruler. So 6/16ths must be the next line up or 3/8ths. I know the marks on the ruler aren’t really there, but if you line your fabric up in the middle of the space between 4/16s (aka 1/4) and 6/16ths (aka 3/8), the chances are really good that you’ve measured 5/16ths of an inch!!

Now to find 15/16ths. If 14/16ths is the same as 7/8ths and 16/16th equals a “one whole unit” marked by the inch line, then 15/16ths is right in the middle of the space between 14/16th (aka 7/8ths) and the inch mark.

I am sorry to say I had to resort to measuring with 16ths on an inch so that the block could finish at 12″. If it had been a 9″ block this wouldn’t have been a problem but this block of the month is all about learning how to construct Geese Blocks in new ways so the lesson of the day is 16ths of an inch!

Goose in the Pond – 9 BOM