Pinterest-ing!

February 19th, 2012

So I have just discovered Pinterest.com

So the way it works is –  You ask to be signed up. They send you an acceptance email then you set up your page. It is linked to Facebook and/or twitter but I don’t know if you have to have an account at one of these sites to participate.

Your page is divided into subjects – such as great quilts, funny stuff, food, etc.. and the premise behind the site is to post inspiring/interesting pics you have found on the net to your page to share. If you post them correctly, the photos are linked to where you found them so credit is always given to the right person. And when you look at the posted photo, a side bar comes up with other pictures from the website from which it was obtained. If you click on the pic, it will take you to its home website too.

Unfortunately some people are obtaining their pics from such places as google images  – we are all out there in some form or fashion so are pics can be found there too with no link back to the home website.

People will began to follow your posts on Pinterest.  And you can follow other people’s posts too – its a wealth of inspiration.  Be careful though, just like any other social media site, you are apt to fall down the rabbit hole, get lost in the maze of links and photos and loose a lot of productive time getting “inspired”!

Why don’t you give it a try?  Follow me down the Rabbit Hole!
Geese in the House!

January 31st, 2012

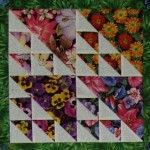
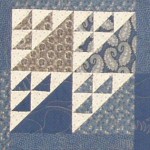
Ah – the next installment of the Goose Block of the Month has arrived.

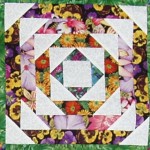
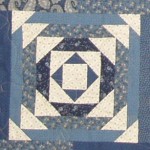
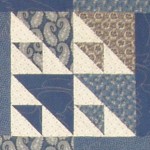
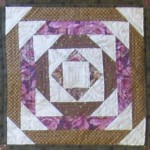
I think I originally called this Wild Goose Log Cabin but have decided that Geese in the House is more fun – you choose! Any way, its got a bit more precision involved with the piecing so be careful! You can choose to make your geese with the background fabric or with a print – Although I apparently have only made this block with light-colored geese, I’ve seen it both ways and both are great!


Have fun with pattern – watch your 1/4″ seam allowances! Good Luck!

wild geese log cabin

Its a good day today!

January 24th, 2012

I love it when things come together the way they are supposed to! Now if the extra fabric I ordered shows up and is indeed a match to the background fabric I bought in 2009, I will finish the borders and it’ll be a great week!!

Doing Stuff for Me

January 16th, 2012

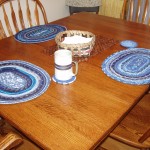
So it is work to actually squeeze in time for what I want to do but I’ve managed to get a few things completed  – things I’ve wanted to do since last Christmas – and by last Christmas, I mean 2010!  That year  I made everyone in our extended family Rope Bowls out of covered clothesline. I even made a few placemats and have been itching to make some for our household ever since. Although they look simple enough, they are quiet time consuming. And I think my method cuts some of the construction time off but its still takes TIME!

I use my zipper foot to cover the rope like cording then trim the seam allowance down to 1/16th” – 1/8″.  As I zigzag the cording together to make the mat or bowl, the seam allowance virtually disappears. I admit there is a difference between the two sides of the mat or bowl but it doesn’t bother me.

So my plan was to use up all those tail ends of binding that I just can’t seem to throw away but soon went through all the blues – this project uses a lot of fabric and even more thread! I have resorted to cutting strips to keep on moving with this project. 2″ is the width that works well for me. As you can see, I’ve got three placemats and two coasters that I think look absolutely fantastic with my teacup! I need at least 6 of both so I keep plugging along during my “free” time… Meanwhile, I continue to work on this!

Its coming along nicely – an epiphany hit me at 4am! I’ve got all the math down – I’ll keep ya posted!

Big Goose, Littel Goose – Next Installment of the Goose BOM

December 31st, 2011

I hope everyone has had a holiday season just the way they liked it – and if not, make a New Year’s resolution to change it! I, for one did spend some time and some money on just me – albeit after Christmas and at the pre-inventory sales! But the point is, I did eventually get around to some me time! And today, I will be washing all that pre-inventory booty before it enters my studio – yes, I am a fabric washer….

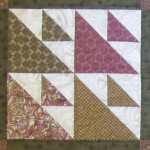
So here’s the next Goose Block – I picked this one to be next in line  since we had just done the “bigger” version of this block – Goose in the Air. This  one could be called Goose and Goslings too but for some reason, I opted for Big Goose, Little Goose. Some of you may know it by another name but that name doesn’t fit the theme we’ve got going here!


Here is the block in different color suggestions! Alas, it is paper-pieced again but a very simple pattern.

big goose little goose pattern   big goose, little goose instructions

Enjoy! And Happy New Year!

Busy Time of Year!

December 23rd, 2011

Pretty much this is all I’ve been looking at for the last few weeks!

Lots of pattern writing going on and its a must-do over the Christmas holidays since its the only time my In-Design guru will be home from college to help me when things don’t make any sense in this program! She has been a jewel – good thing she  knows her stuff although I think she’s beginning to have her doubts about me!

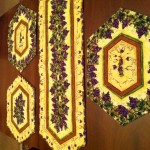
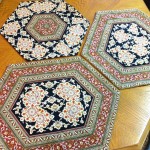
But before I immersed myself in computer lingo this month, I did do a little bit of sewing for Christmas! Love this pattern! Easy Striped Table Runner designed by Karen Montgomery. I don’t often buy patterns –  being somewhat of “I can figure that out” kind of quilter but this one was worth the investment! And it was as much fun or even more than doing a Stack-n-whack quilt! Each and every table runner was a beautiful surprise! I’ll show you a few since I have already delivered these and they have been opened!


Each Christmas, I try to make gifts – saves money and seems more meaningful to me than going out and shopping til I drop and breaking the budget too! I only wish that one Christmas I would spend some time making some of these fun gifts just for myself!

I would stop and do that now but I’ve only got so much time with my In-design guru and every minute counts!

Meanwhile, here’s hoping every one has a happy and healthy Holiday season – Blessing to all and Happy New Year!


Knife-Edge Binding

December 5th, 2011

I am absolutely enamored with the finished look of a knife-edge binding. Others might call it something else but  I am referring to the binding that is flipped to the back and doesn’t show on the front.

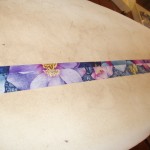
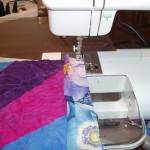
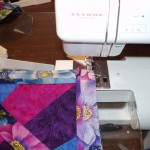
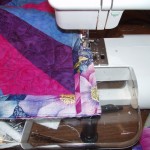
So, here’s a little pictorial tutorial of how to do it…

Measure the sides of your quilt and cut one 2″  binding strip for each side.

Then fold and press under 1/2″ on one side of each binding strip. This will be your final edge of your binding.

Sew your first binding strip on by placing it on the edge of your quilt, right sides together (pinning  is recommended), and sew with a 1/4″ seam allowance. Add the second binding strip onto the opposite side of the quilt in the same manner.

Add the remaining two binding strips in the same manner. They will overlap the first two strips at the corners.


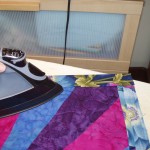
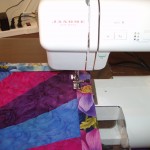
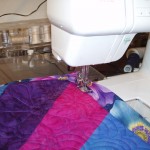
At this point, I like to press the binding towards the seam allowance. Start with the binding strips on top first – the last two you sewed on. Then sew a seam through the binding and seam allowance. I use about a 1 /16″ to 1/8″ seam allowance and this allows the fold to turn to the back a little better. You may decide that you don’t like the look of that extra stitching line through the binding on the back and skip it but truthfully, I think  it really helps.


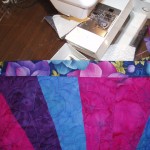
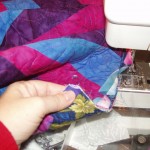
Now, repeat this process with the remaining two sides. It will be a little trickier because the corners have been trapped in when the final two bindings were attached but ease the iron up as close as possible into the corner and do the same with the sewing machine foot.


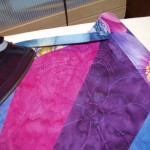
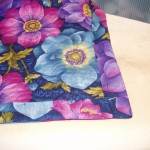
Now, roll the binding to the back side, pin in place and hand stitch it down.  Trimming the bulk in the corners is helpful – I cut the tip of the corner off at a 45 degree angle and sometimes “shave” a little off the sides but be very careful not to trim so deeply that you mess up the binding! I also have to work the corners out by using a blunt stick to help turn them and push them into shape as well as gently “picking and pulling” from the outside. Be careful not to pull so much that the corner is distorted. I never get a “pointy” corner but a soft round corner. You may be better at it than me!


But there you have it – Voila!


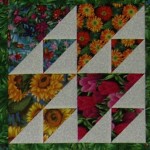
Geese in the Air!

November 30th, 2011

Its that time again! Time to think about Geese! Its so easy to do around here. The Geese are “flocking” back to the river and making lots and lots of noise! I assume they are just passing through because they are not so prevalent during the rest of the year, but here in the fall, there are 1000s of them on the water all night long!  A veritable cacophony of honking! They fly in and out around the clock   – yet another reason for not owning a house right on the water. These birds are loud!

So in honor of the all the Geese flying overhead, here is Geese in the Air!


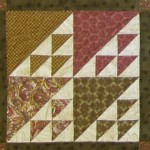
Geese in the Air

Click the link above for your instructions. These geese are getting pieced the old fashioned way – lot of half-square triangles – so be careful with the cutting and use an accurate 1/4″ seam allowance so everything will come out to the size they are supposed to be. And be grateful that your geese are so much quieter than mine!

Really cool stuff – Check out my flowers!

November 17th, 2011

While in Houston, I came across this demo in the Jenny Haskins booth. I’ll show you how it works here as I can’t find any thing about it at her website. She starts out with her product Krinkle Magic – her version of Texture Magic, a Superior Threads product – here are some demo videos on YouTube.

I’ll do my best to explain this wonderful 3-dimensional flower technique to you. This concept opens up a world of ideas with applique and embellishment! First you start with your flower fabric. I used a bastiste but you could use anything from cottons to silks and sheers. You will have to play with it to see the results. I made a sandwich of flower fabric, Texture magic, flower fabric – the flower fabrics have “right sides” to the outside of the sandwich. Then I hooped it and  stitched a flower. If you have a embroidery machine, you could just program in a flower design. I thread-painted mine.


Next I trimmed very closely around it. Jenny Haskins used synthetic fabrics and threads and has a “burning” tool that trimmed away the extra fabric quite nicely but could never be used with cottons!!

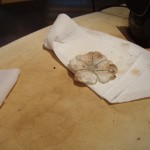
After its trimmed, you  attack it with steam! Do not let the iron touch the flower or the texture magic will melt into hard plastic. Also, make sure your iron is clean. I never use steam so when I filled up my iron and let it blow, it decided now was a good time to clean out all its pipes –

This was pretty disgusting as well as ruining my flower!! I had to even wash the ironing board cover!!! So make sure your steam is clean. I ended up steaming my flowers very carefully with the tea kettle!!


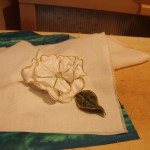
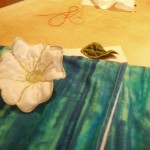
Here’s a cleaner version of the flower – note the leaf too! I made two flowers, one slightly smaller. They can be sewn together in as many layers as you would like your flower to be. You may even consider embellishing the flower center with beads or french knots or buttons… I had a lot of fun with this – hope you give it a try!

Back from Houston and the Quilt Show

November 9th, 2011

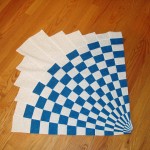
What a wonderful experience the International Quilt Show in Houston Texas is! The quilts were absolutely stunning! My favorite is Caryl Bryer Fallert’s Checks and Balances – take a moment to click on the link to see what I mean. Actually the photo is great but you miss a lot of the detail that makes it outstanding! If you ever get the chance to see it in person, there is so much more in the quilt that photos just can’t catch. Her skill in the construction and quilting is amazing. It did  not win best of show but remains my favorite.

The Best of Show Quilt, Harmony Within by Sue McCarty was a stunner also. When you click on the link, you will notice there’s an awful lot of gold in this piece. It is all threadwork! Gold thread in the black borders and gold thread in the red background. This piece actually has very little applique. And the most outstanding part of it is she created it on a Gammill 26″ classic Longarm with absolutely no bells and whistles! She is my hero! I am inspired to reach to her level, at least this week, that is – next week, I may be more realistic about my goals…